
Many people believe using a sewing machine is a mix of science and witchcraft and best left to women—this is incorrect. In reality, sewing machines are straightforward to use, and mastering them can be incredibly useful for a 4×4 enthusiast. For instance, making covers for high lifts, fridges, and similar items becomes a simple and economical task.
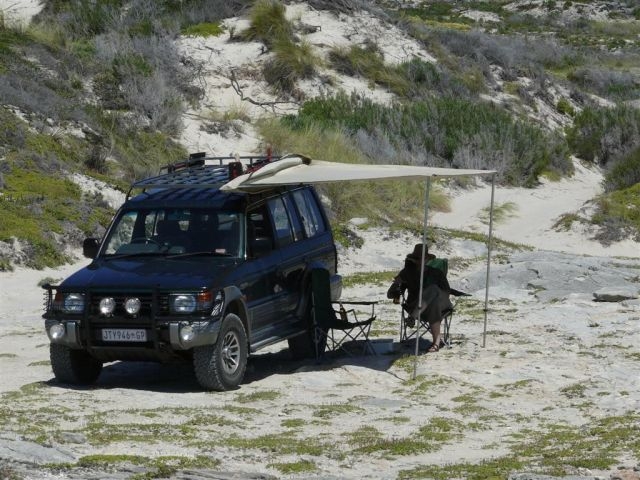
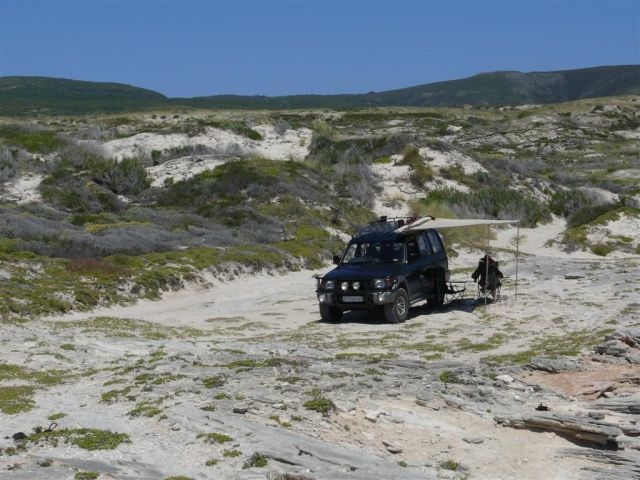
Building your own awning is a perfect example of such a project. It should take about 4 to 5 hours and cost a fraction of the price of a commercial product. I have used an old domestic sewing machine for this purpose. The only adjustment needed was to switch to a stronger needle. For delicate fabrics, use needles size #7 to #11, while for heavier fabrics, #16 to #20 works better with thicker thread.
4o mini
Materials:
.5m Canvas for the top and pouch
20mm wide Webbing for anchor ropes
2.5m Zipper
1m 50mm Webbing for pole guides
Aluminum poles for the framework
Adaptors for the poles
Guy ropes
Eyelets for the pole mounts
I haven’t specified quantities for the canvas and poles because these depend on the size of your awning. Canvas typically comes in widths of 1.2, 1.5, and 1.8 meters and various thicknesses. Choose a canvas that fits your needs, keeping in mind that thicker material is harder to sew and work with, while thinner material may not last as long.
For example, if you need an awning measuring 2.5 x 2.5 meters, you will need to add a seam in the middle. Start by cutting two main panels for the roof. Remember, you’ll need two poles—one for the front and one for the back—to frame the canvas. Be sure to allow for a 10mm seam on the front and back, and a 50mm skirt on the sides.

The drawing above provides a basic idea of the desired outcome. Remember, the dimensions are not fixed and should be adjusted to fit your specific needs. Importantly, avoid raw edges to give the finished product a more professional appearance.
Start by joining the two main panels. Stitch the raw ends of the seam back on themselves to create a rolled seam, then double-stitch for added strength.
Next, create the back tube for the mounting pole. Begin by seaming the 10mm end seam, then overlap the 50mm section to form a tube.
For the front, add two triangular gussets to reinforce the eyelets and rope tie-downs. These gussets are 150mm square, folded diagonally, and stitched in place. Afterward, stitch the front tube, making sure it does not run the full length. Leave space at the ends for the front pole to connect with the side and supporting poles. Finally, stitch the two side aprons and sew two loops of 20mm webbing onto the triangular gussets for the stay ropes.
To secure the side poles, use short pieces of 50mm webbing sewn into tubes or four pieces of Velcro to hold the top to the side poles. Insert two eyelets into the front gussets, ensuring they are not too close to the edge. Once done, the top of the awning is nearly complete.

Now, focus on the pole work and adding a pouch to keep everything organized. Once this is done, your project will be complete.
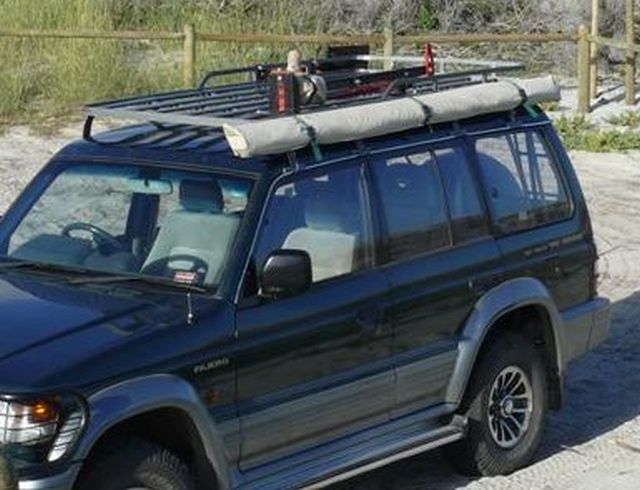
Pole work may seem intricate and intimidating, but it’s actually straightforward. The front and back poles are solid units and are rarely removed. In contrast, the side and support poles are telescopic and fold up with the front, rolling up with the awning.
You can find poles and fittings at most caravan shops. In the picture, I’ve shown the fittings used on the front corners, as well as two types of eyelets for the top. The side poles attach to the back pole using C-clips, which are also available at caravan shops.
Lastly, create a bag to store everything. First, roll the awning up onto the poles to determine the required size for the bag. Cut the sides of the bag about 50mm larger than necessary. Stitch three sides together on the wrong side. Then, turn the bag inside out and attach the zipper to the open end.
For mounting, I used 6mm galvanized cup squares. These were installed through the inside of the bag and the rear pole of the awning, securing it directly to my roof rack.

I hope this guide helps to motivate some of you to have a go at making your awning!
Good luck,
Henk
Canvas Room, Custom made canvas Tents, Canvas tent Repairs, Alterations and Additions.